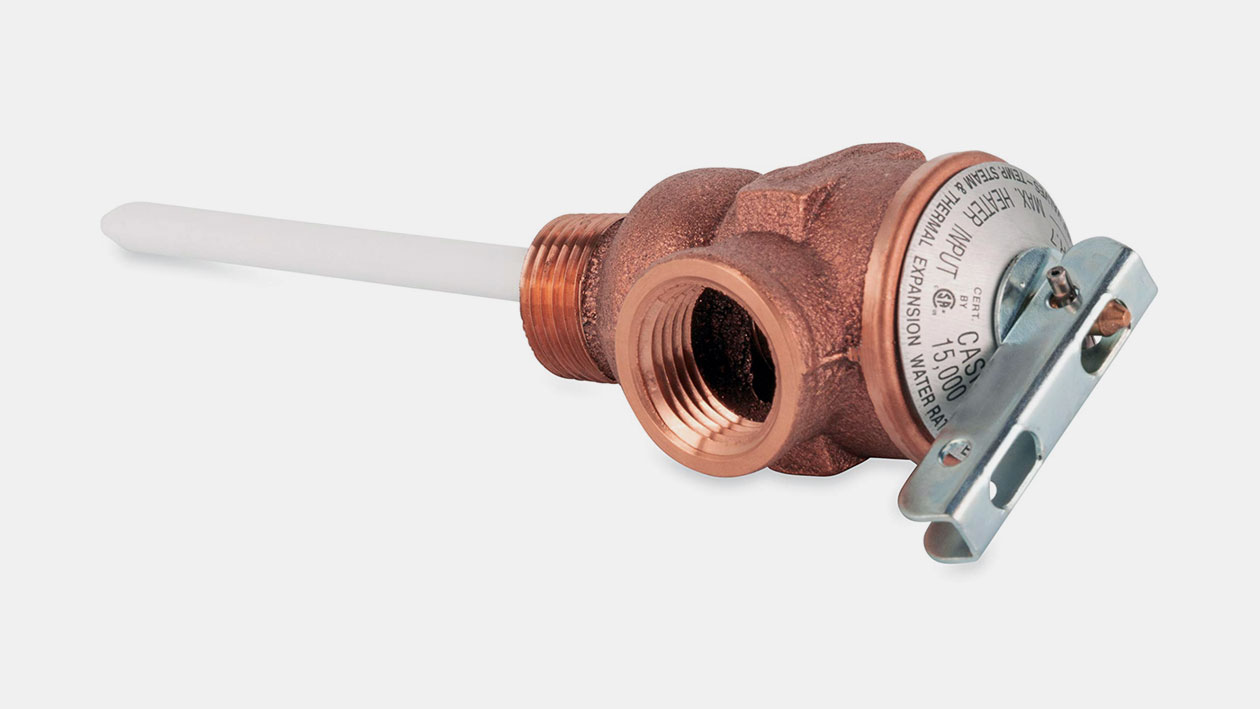
A TPR valve (also known as a temperature pressure relief valve) is a critical safety device that prevents water heater explosions by automatically releasing water when temperature exceeds 99°C or pressure exceeds 1000 kPa, protecting your home from catastrophic tank failures. If you’ve ever wondered about that small valve with a pipe running down the side of your hot water system, you’re looking at the one component standing between you and potential disaster.
Why is My TPR Valve Leaking?
Let me tell you, the number of panicked calls I’ve fielded about leaking TPR valves would surprise you. The good news? Not every leak means you’re facing an emergency. Here’s how to quickly work out what’s happening with your valve.
3-Step Leak Diagnosis Flowchart
Step 1: Check Your Leak Timing
First, pay attention to when the leak occurs. If you’re only seeing water during or shortly after your system heats up, that’s often normal thermal expansion at work. Your water expands as it heats, and that extra volume needs somewhere to go. However, if you’re seeing continuous dripping throughout the day, that’s when you need to take action.
Step 2: Test Your Valve
Put on some gloves and carefully lift the test lever on your TPR valve for about three seconds. Hot water should flow out freely, then stop completely when you release it. No water flow? Your valve’s stuck and needs replacing. Water won’t stop flowing after you release? Same deal – replacement time.
Step 3: Check Your System Pressure
Grab a pressure gauge from Bunnings (about $15) and check your water pressure at a nearby tap. You’re looking for 275-550 kPa (40-80 PSI if your gauge shows that). Anything over 550 kPa means your TPR valve is doing exactly what it should – protecting your system from excessive pressure. You’ll need a pressure limiting valve installed on your main water line.
Try This Now
Before you do anything else:
- Place a bucket under your discharge pipe to measure how much water you’re losing
- Lift the test lever for 3 seconds – hot water should flow then stop cleanly
- Check your water pressure at the laundry tap or garden hose with a gauge
How to Tell if a TPR Valve is Bad
After years in the plumbing industry, I can spot a dodgy TPR valve from across the room. But you don’t need my experience – just this simple checklist or our handy interactive tool to know when your valve needs replacing.
5-Point Visual Inspection Checklist
1. The Lever Test (Pass/Fail)
✓ Pass: Water flows freely when lifted, stops completely when released
✗ Fail: No water flow, continuous dripping, or lever won’t move
2. Age Check
✓ Pass: Valve is less than 5 years old
✗ Fail: Over 5 years old (replace regardless of appearance – it’s cheap insurance)
3. Corrosion Inspection
✓ Pass: Clean metal surface, no visible buildup
✗ Fail: Rust streaks, green corrosion, or crusty mineral deposits
4. Dripping Assessment
✓ Pass: Only drips during heating cycles
✗ Fail: Any leak when system isn’t heating
5. Response Speed
✓ Pass: Valve opens and closes within 2 seconds
✗ Fail: Sluggish operation or delayed closing
🔧 TPR Valve Diagnostic Tool
Answer a few quick questions to diagnose your valve issue
When does your TPR valve leak?
What happens when you lift the test lever?
What's your water pressure reading?
Your TPR valve is working normally! The occasional dripping during heating cycles is expected as water expands when heated.
Recommended Actions:
- Monitor the leak frequency - should only occur during heating
- Consider installing an expansion tank if leaks are frequent
- Test your valve every 6 months
- Schedule replacement if valve is over 5 years old
Your TPR valve has failed and needs immediate replacement. This is a safety hazard that requires prompt attention.
Immediate Actions Required:
- Turn off power to your hot water system
- Place a bucket under the discharge pipe
- Call a plumber today for replacement
- Budget $200-$550 for professional replacement
- Do NOT ignore this - explosion risk increases with a faulty valve
Your TPR valve is doing its job by releasing excess pressure. The problem is your water pressure, not the valve.
Required Actions:
- Install a pressure limiting valve on your main water line
- This will cost $300-$600 professionally installed
- Your TPR valve is protecting your system - don't disable it
- High pressure damages appliances and pipes throughout your home
You need to check your water pressure to complete the diagnosis. This is a crucial step in determining the cause.
Next Steps:
- Buy a pressure gauge from Bunnings (~$15)
- Attach to laundry tap or garden hose
- Turn tap on fully and read the gauge
- Normal range: 275-550 kPa
- Return here with your reading to complete diagnosis
Emergency Warning Signs
Drop everything and call a hot water plumber if you see:
- Steam shooting out instead of water droplets
- Valve won’t close after manual testing
- Visible cracks or damage to the valve body or discharge pipe
- Water pooling around your hot water system’s base
How to Test a TPR Valve
Testing your TPR valve should be as routine as checking your smoke alarm batteries. Here’s the proper way to do it safely – and yes, I’ve seen some absolute shockers from DIY attempts gone wrong.
Complete 6-Step Testing Protocol
What You’ll Need:
- Heat-resistant gloves (not your gardening gloves!)
- Safety glasses or sunnies
- A 10-litre bucket
- Old towels for the floor
The Testing Procedure:
Step 1: Preparation
Turn off your hot water system’s power at the switchboard (electric) or gas supply (gas systems). Wait 30 minutes for the water to cool slightly. This isn’t the time to be a hero – scalding water is no joke.
Step 2: Position Your Bucket
Place your bucket directly under the discharge pipe’s end. If the pipe doesn’t reach the ground, you might need to hold it or prop it up.
Step 3: The Manual Test
Wearing your gloves, firmly lift the valve’s lever for 2-3 seconds. Don’t be timid – give it a proper lift.
Step 4: Observe the Flow
Hot water should rush out immediately with decent pressure. Think garden hose pressure, not a trickle.
Step 5: Release and Check
Let go of the lever. It should snap back into place, and water flow should stop completely within 3 seconds.
Step 6: Monitor for Drips
Watch for 5 minutes. Not a single drop should fall after the initial flow stops.
Success Metrics
Your valve passes if:
- Water flows at high pressure during the test
- Complete flow stoppage within 3 seconds of releasing the lever
- Zero dripping during your 5-minute observation period
Failed any of these? Time for a replacement. Don’t put it off – a faulty TPR valve is like driving without a seatbelt.
TPR Valve Replacement Costs
Let’s talk money. I know it’s tempting to ignore that dripping valve when you hear replacement costs, but trust me, the alternative is far more expensive.
Complete Cost Breakdown
| Component | DIY Cost | Professional Cost |
|---|---|---|
| TPR Valve | $50-$150 | $50-$150 |
| Teflon tape, fittings | $25-$50 | Included |
| Labour | $0 (your time) | $150-$400 |
| Total Range | $75-$200 | $200-$550 |
Hidden Costs Nobody Mentions
- Council permits: $50-$200 (some councils require them for hot water work)
- System pressure testing: $75-$150 if pressure issues are suspected
- Expansion tank replacement: $200-$400 if your system needs one
- After-hours callout: Add $100-$200 for emergency service
Should You DIY or Call a Professional?
Go DIY if:
- You’re comfortable with basic DIY plumbing
- The valve is easily accessible (not behind the system or in a tight cupboard)
- It’s a straightforward valve swap with no other issues
- You own the proper tools already
Call a Professional if:
- You’ve discovered pressure problems in your system
- Your expansion tank needs attention
- You want to maintain your hot water system’s warranty
- The valve is in an awkward spot
- You’re not 100% confident (water damage costs more than a plumber)
Your TPR valve is cheap insurance against catastrophic failure. In my years fixing hot water systems across the Central Coast and Sydney, I’ve seen what happens when these valves fail – and it’s never pretty. Test yours every six months, replace it every five years regardless of condition, and don’t ignore warning signs.
If you’re dealing with a leak right now, start with the diagnostic steps above. Most issues are straightforward fixes, but when in doubt, call a licensed plumber from True Flow Plumbing & Drains, we’d be glad to help. The couple hundred dollars you’ll spend is nothing compared to replacing water-damaged floors, walls, and belongings.


