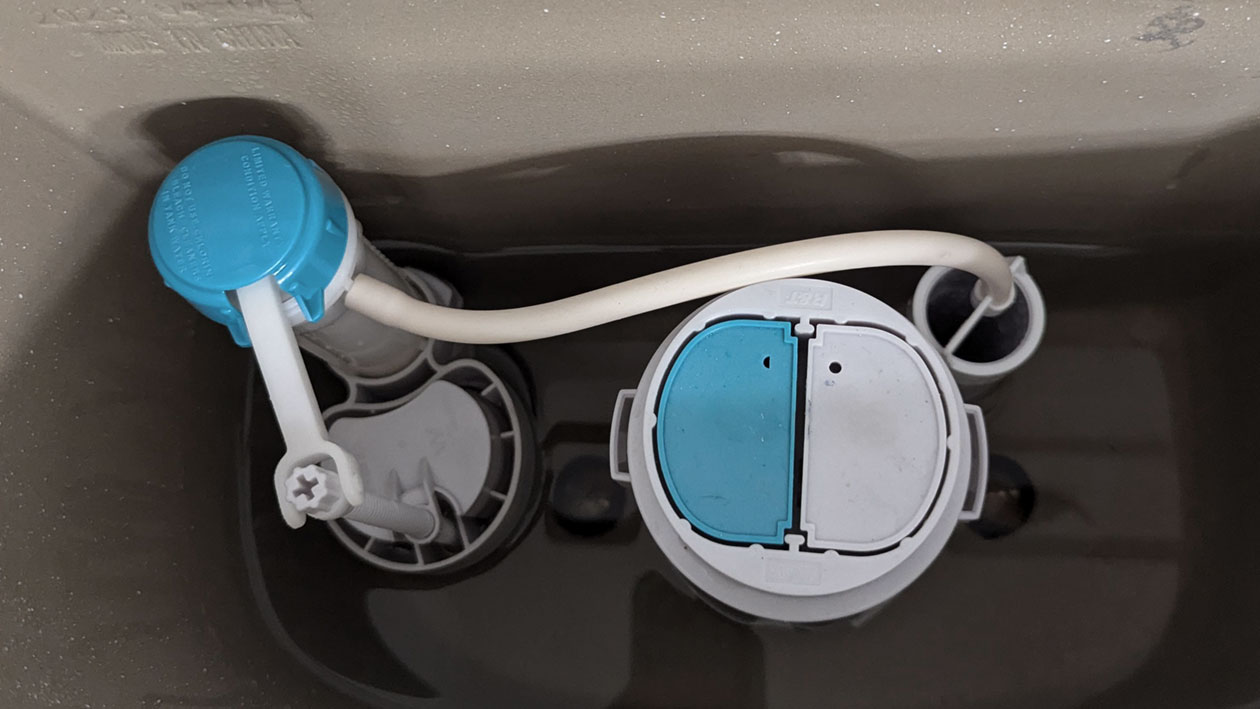
Toilet flushing systems vary in design, efficiency, and application, with each type offering distinct advantages. Here’s a breakdown of the most common systems:
Gravity Flush
The most widely used system, it relies on gravity to move water from the tank to the bowl, creating a siphoning action that removes waste. Modern versions use enlarged flush valves and optimised bowl designs to improve efficiency.
- Pros: Simple, affordable, and easy to maintain.
- Cons: May require multiple flushes for stubborn waste.
Pressure-Assisted
Combines compressed air with gravity to force water into the bowl, making it ideal for rear-discharge or upflush toilets. A secondary pressure tank inside the main tank pressurises the water.
- Pros: Powerful flush, reduced tank sweating.
- Cons: Noisy, higher upfront cost, and complex repairs if the toilet won’t flush.
Dual Flush
Offers two options: a partial flush (3.0–4.2 litres) for liquids and a full flush (6.1 litres) for solids. Activated by buttons or levers, it’s the most water-efficient system.
- Pros: Reduces water usage by up to 50% compared to single-flush models.
- Cons: Buttons may require more maintenance. A common cause of running toilets.
Tornado/Double-Cyclone
Uses 2–3 sideways nozzles to create a swirling vortex, thoroughly cleaning the bowl. Toto popularised this system, with the tornado variant adding a third jet for enhanced performance.
- Pros: Efficient cleaning, quieter operation, and clog-resistant.
- Cons: Higher initial cost.
Vacuum-Assisted
Generates suction in the trapway during flushing, improving waste removal. Commonly found in commercial settings.
- Pros: Strong flush, no condensation issues.
- Cons: Limited residential availability.
Double Vortex
American Standard’s design uses dual rim nozzles to create a vortex, combining rim washing and direct flushing.
- Pros: Effective for sticky waste, durable for high-traffic areas.
Tower Style (Canister Flush)
Kohler’s system uses a central canister instead of a flapper, providing a full-perimeter rinse.
- Pros: Consistent water distribution, fewer leaks.
Less Common Systems
- Chemical: Uses chemicals to break down waste, common in planes/boats.
- Washdown: Relies on water force rather than siphoning, with a wide trapway.
- Electronically Controlled: Adjustable flush volume via sensors or buttons.
For high-efficiency residential use, dual flush or tornado systems are optimal, while pressure-assisted models suit commercial needs. Gravity systems remain a cost-effective choice for standard households.
| System | Water Efficiency | Noise Level | Best For |
|---|---|---|---|
| Gravity Flush | Moderate | Quiet | Residential use |
| Pressure-Assisted | High | Loud | Commercial/upflush |
| Dual Flush | Very High | Quiet | Eco-conscious homes |
| Tornado/Double-Cyclone | High | Quiet | Easy cleaning |
Can you replace the flushing mechanism in a toilet?
Yes, you can replace a toilet flushing mechanism yourself with basic tools and patience. Here’s a concise guide based on common procedures from plumbing resources:
1. Shut Off Water Supply
Turn the shut-off valve clockwise behind the toilet, then flush to drain the tank. Use a sponge to remove residual water.
2. Remove Old Mechanism
Disconnect the water supply line and unscrew tank bolts with an adjustable wrench.
- For flush valves: Unscrew the spud nut under the tank to detach the old valve.
- For fill valves: Twist the entire assembly counterclockwise and lift out.
3. Install New Components
- Insert the new flush valve, ensuring the rubber gasket seats properly. Tighten the spud nut snugly (avoid overtightening).
- Adjust the fill valve height to set the water level 1″ below the overflow tube.
- Reattach the flapper chain and refill tube.
4. Reassemble and Test
Reconnect the water supply, turn it on, and check for leaks. Adjust the float or flush volume as needed.
Common Challenges & Fixes
- Stuck Parts: Mineral buildup can freeze mechanisms. Soak affected areas in vinegar or use penetrating oil on corroded nuts.
- Leaks After Replacement: Ensure rubber gaskets are centred and undamaged. Apply plumber’s tape to threaded connections.
- Water Level Issues: Adjust the float arm or screw to lower/raise the fill level.
Tools Required
- Adjustable wrench
- Screwdriver
- Replacement flush/fill valve kit
- Plumber’s tape
- Towels/sponge
While most replacements take 1–2 hours, complex setups (e.g., dual-flush or pressure-assisted systems) may require manufacturer-specific parts. If corrosion or persistent leaks occur, consider hiring a plumber who specialises in fixing toilets to help avoid costly water damage.


