A running toilet wastes water and increases your water bill. Thankfully, you can often fix it yourself, and this guide provides simple solutions.
Tools and Materials Needed
Before embarking on your toilet repair journey, ensure you have gathered the right tools and materials.
For starters, have a sturdy pair of pliers and an adjustable wrench ready to loosen and tighten nuts and bolts. A trusty screwdriver becomes indispensable for removing the toilet handle or adjusting the float.
Yet, your toolkit only solves half the puzzle. While looking over the inner workings of your toilet, you may find parts that need replacement. Keep a reliable flapper, which acts as a gatekeeper, controlling the water transfer from tank to bowl. Moreover, a new fill valve may be your solution to controlling the water flow into the tank. Additionally, pay attention to the significance of fresh gaskets and seals; these small heroes ensure a watertight seal and can mean the difference between success and a bathroom flood.
- Pliers
- Wrench
- Screwdriver
- Replacement flapper
- Fill valve
- Gaskets and seals
Steps to Silence Your Running Toilet
Please follow these diagnostic steps to find out the cause of your running toilet and implement the right fix. Many issues require only simple adjustments or replacements.
Step 1: Inspect the Refill Tube
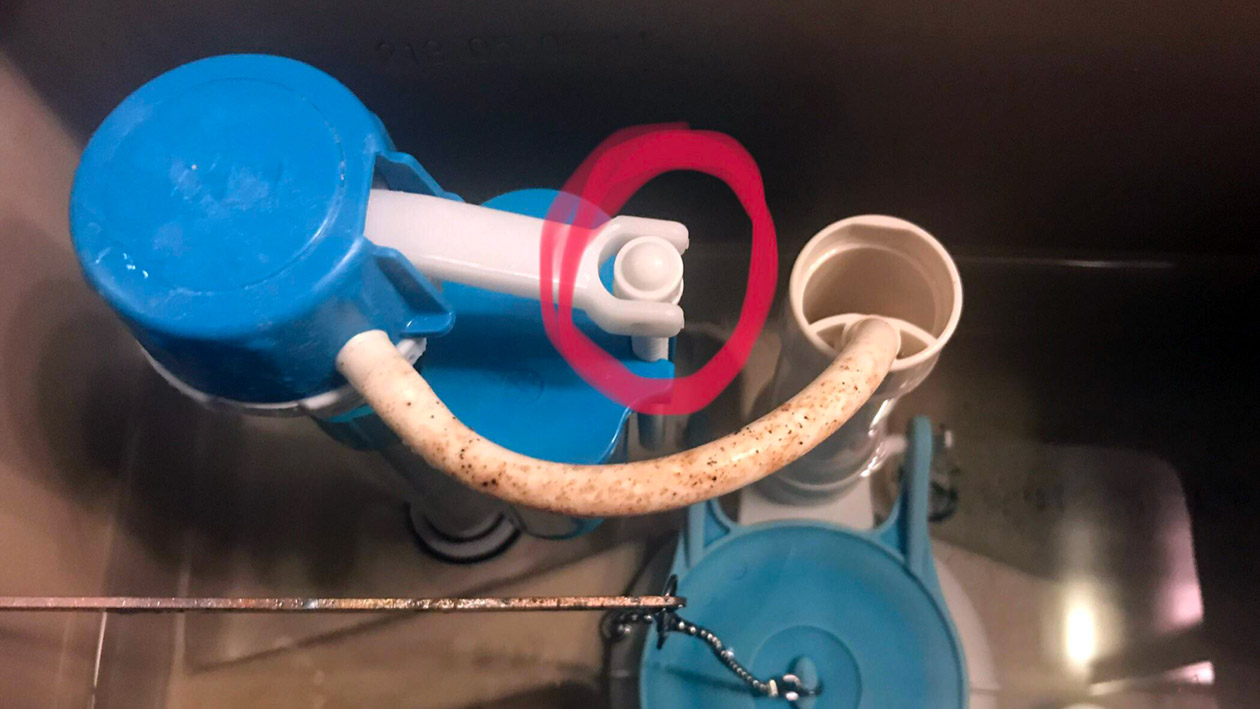
The refill tube, a small flexible tube, carries water from the fill valve to the overflow tube. This tube refills the bowl after each flush. If detached, kinked, or incorrectly positioned, it can disrupt the refill process and cause the toilet to run continuously. The water may flow into the overflow tube instead of the bowl or siphon water out of the tank.
Action: Carefully examine the refill tube’s connection at both ends – the fill valve nipple and the overflow tube – to ensure it’s firmly attached. The tube should extend approximately one inch below the water line inside the overflow tube. This placement prevents siphoning while ensuring proper refilling. If the tube is cracked or deteriorated, replace it with a new one. You can find these at most hardware stores.
Step 2: Check the Float Height (for float-based fill valves)
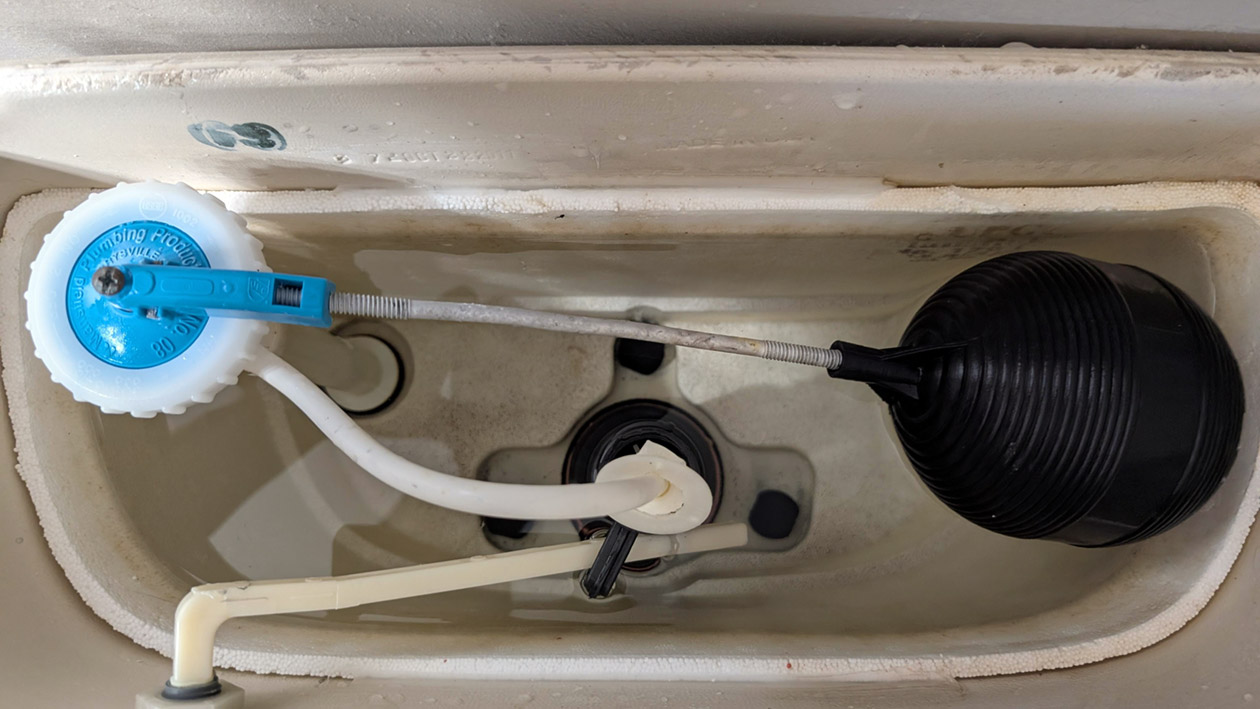
Older toilets typically utilise a float ball flushing mechanism connected to the fill valve by a metal arm. This float ball rises and falls with the water level, controlling the fill valve. If the float is set too high, the tank overfills, causing water to constantly flow into the overflow tube and resulting in a running toilet.
Action: Locate the float arm. Gently bend the arm downwards to lower the float and, subsequently, the water level. The ideal water level is about an inch below the top of the overflow tube. Avoid bending the arm too drastically, as this can damage the mechanism. Incremental adjustments are recommended.
Step 3: Adjust or Replace the Fill Valve (for floatless fill valves)
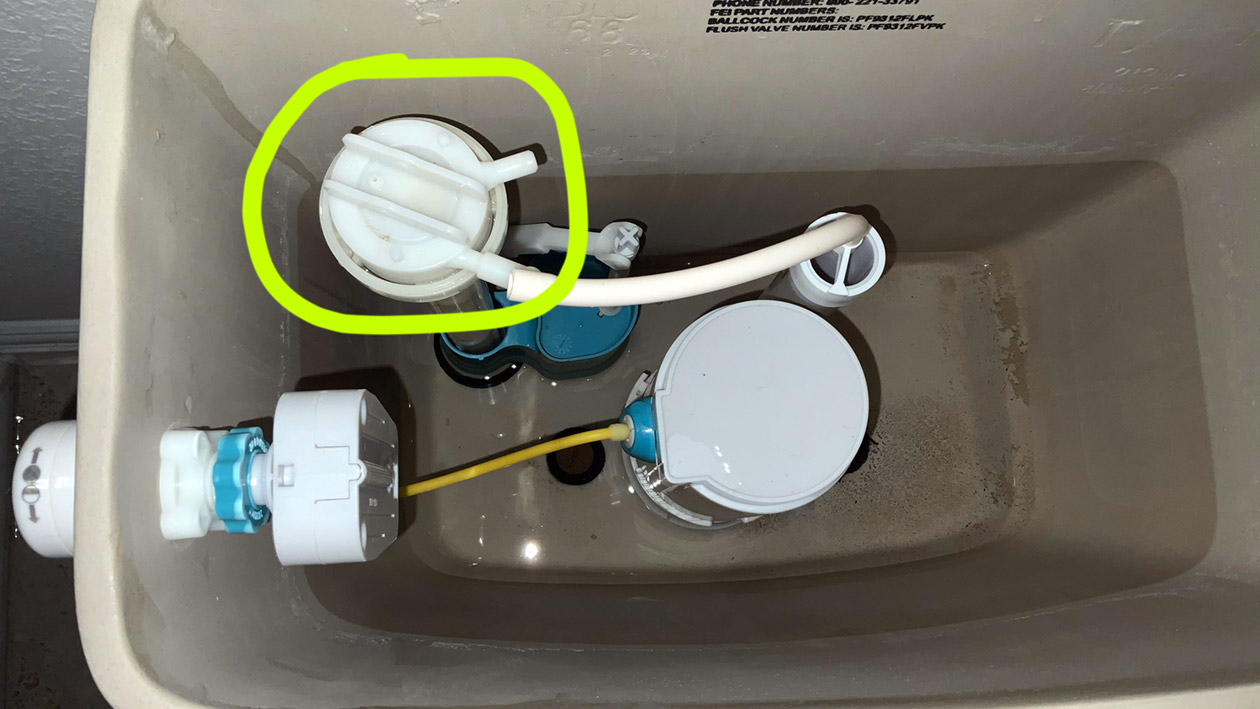
Modern toilets frequently feature floatless fill valves. These valves use a diaphragm and pressure differential to regulate the water level. While generally more reliable than float-based systems, they can sometimes malfunction, leading to overfilling and a running toilet.
Action (Adjustment): Locate the fill valve adjustment screw, typically situated on the top or side of the valve. Turning the screw clockwise lowers the water level, while turning it counter-clockwise raises it. Refer to the manufacturer’s instructions for specific guidance.
Action (Replacement – if adjustment fails): If adjusting the screw doesn’t resolve the issue, the fill valve may need replacement.
- Turn off the water supply valve located behind the toilet. Flush the toilet to empty the tank.
- Disconnect the water supply line from the fill valve using a wrench or pliers. Have a bucket or towels handy to catch any remaining water.
- Remove the lock nut that secures the fill valve to the bottom of the tank. You may need a wrench for this.
- Install the new fill valve by inserting it into the tank opening and securing it with the lock nut. Ensure the rubber washer is properly seated to create a watertight seal.
- Reconnect the water supply line. Slowly turn the water supply valve back on.
- Adjust the water level to the correct height, approximately an inch below the top of the overflow tube.
Step 4: Check and Adjust the Chain Length
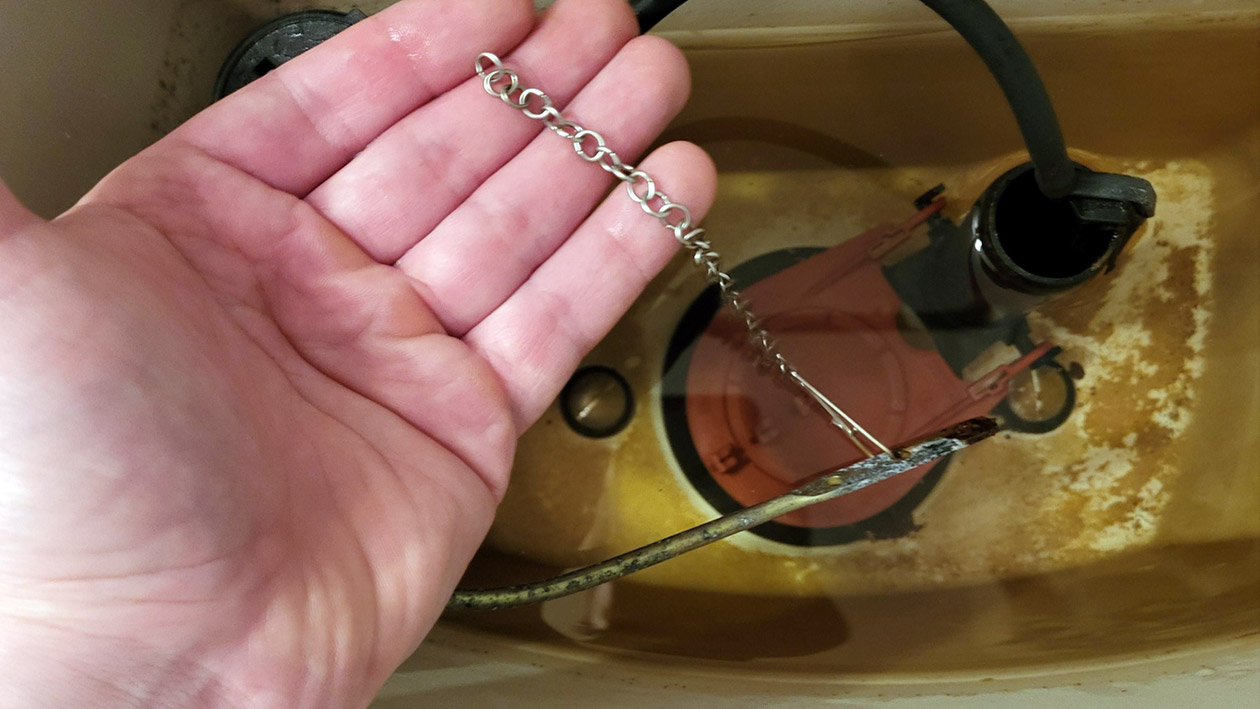
The chain connects the trip lever handle to the flapper. If the chain is too long, it can become tangled or get caught under the flapper, preventing it from sealing properly. This leads to a constantly running toilet.
Action: Flush the toilet and observe the chain’s movement. If it’s too long, shorten it by unhooking it from the trip lever arm and reattaching it to a higher link on the chain. Ensure there is a slight slack when the flapper is closed, but not so much that it interferes with the flapper’s seal.
Step 5: Inspect and Replace the Flapper
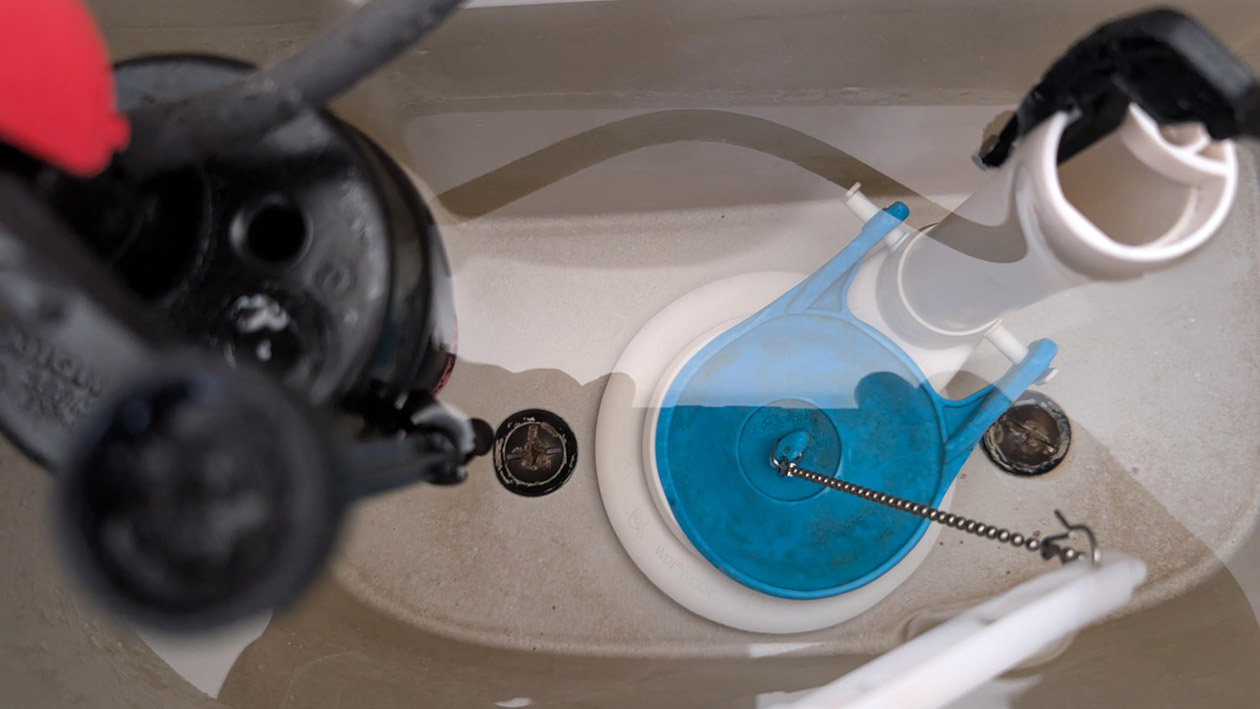
The flapper is a rubber seal at the bottom of the tank. It opens and closes to allow water to flow into the bowl during a flush. A worn, damaged, or misaligned flapper is a common cause of running toilets. It can’t create a proper seal, allowing water to continuously leak into the bowl.
Action:
- Turn off the water supply valve. Flush the toilet to empty the tank.
- Unhook the chain from the flapper. Detach the flapper from the tabs or ears on the overflow tube.
- Install the new flapper by attaching it to the overflow tube and reconnecting the chain. Ensure it sits flush and creates a tight seal.
Buying Guide (Flappers)
Flappers are not universal. They come in various sizes and materials to suit different toilet models. To ensure you purchase the correct replacement, check your toilet’s manufacturer’s website or take the old flapper to the hardware store for comparison.
What if these fixes don’t work?
While the previous steps address the most common causes, occasionally the problem persists. If your issue is a mechanical noise (like a squeak when you sit down) rather than a water leak, check our guide on how to fix a squeaking toilet seat. Here are additional troubleshooting steps:
- Check for Cracks: Carefully inspect the tank and bowl for any cracks. Hairline cracks can be difficult to spot but can lead to leaks. A dry tank test can help identify these: Empty and dry the tank thoroughly. Then, add a few drops of food colouring to the remaining water in the bowl. If the colour appears in the tank, you likely have a crack.
- Inspect the Tank Bolts: The bolts that secure the tank to the bowl can loosen or corrode, causing leaks. Check for tightness and signs of corrosion. Tighten or replace them as needed.
- Water Supply Line: A leaky water supply line can also contribute to running toilet issues. Check for drips or leaks around the connection to the tank and the shut-off valve. Tighten connections or replace the supply line if necessary.
- Worn or Damaged Flush Valve Gasket: A gasket is located inside the tank at the base of the flush valve. If this gasket is worn or damaged, it can cause leaks, which usually require replacing the entire flush valve assembly.
When to Call a Plumber
If you’ve tried all the troubleshooting steps and your toilet continues to run, it’s time to call a licensed plumber who specialises in toilet repairs. A plumber has the expertise to diagnose and fix more complex issues, such as a cracked toilet or problems with the internal plumbing, they can even install a new toilet if needed.
Routine Checks to Keep Toilet Parts Functioning
- Visual Inspection: Regularly inspect the toilet tank and bowl for any signs of cracks, leaks, or damage. Look for water stains on the floor around the base of the toilet, which can indicate a hidden toilet leak.
- Chain Check: Periodically check the flapper chain to ensure it has the correct length and isn’t tangled or obstructed. Adjust the length as needed to maintain proper slack.
- Flapper Test: Test the flapper’s seal by adding a few drops of food colouring to the tank water. If the coloured water appears in the bowl without flushing, the flapper isn’t sealing properly and needs replacing.
- Fill Valve Check: Monitor the fill valve for leaks or unusual noises. Ensure the tank’s water level is correct and that the fill valve isn’t overfilling or failing to shut off completely.
Suggested Maintenance Schedule to Prevent Future Running Toilet Issues
- Every 3 Months: Check the flapper chain and adjust if necessary. Inspect the toilet for leaks.
- Every 6 Months: Test the flapper’s seal using the food colouring method.
- Every Year: Replace the flapper, even if it functions correctly. Flappers are inexpensive and easy to replace, preventing future issues caused by wear and tear.
- Every 2-3 Years: Inspect and clean the fill valve to remove mineral buildup that can affect its performance.


